- Home
- About Me
- My Work
- What I Do
Design & Development
Digital Marketing
Consulting & Speaking
- Weekly Blog

Design & Development
Digital Marketing
Consulting & Speaking
February 14, 2017
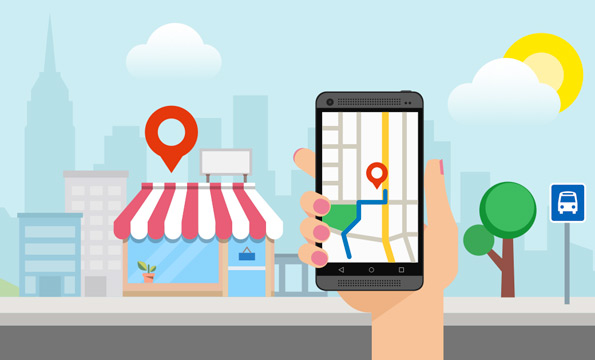
Ever wonder how your competitors appear on Google Maps in a neat little listing that details their name, address, hours of operation and even photos? The answer: Google My Business. Adding your business and verifying it directly with Google will not only add your listing in with your competitors but will also help you with local SEO, provide traffic insights and even allow you to respond to reviews.
While this directory has gone through various name changes over the years (Google+ Local, Google Places) the process of adding your listing has remained fairly simple. What’s changed is the where and how to get your business on Google Maps via Google My Business.
Here’s a simple guide beginner’s can use to add your listing to Google My Business.
Visit www.google.com/business.
Sign in to the GMail account you’d like to use to manage your listing and move to Step 3. If you don’t have a GMail account, create one using the on-screen instructions and then move on to Step 3.
Sometimes your business may already have a listing created. This could be because someone else has already setup a Google My Business account on behalf of your business or your business may be popular enough that Google created a very simple listing for you.
Either way, once you’ve signed in using your GMail account, begin typing your business name into the area provided under “Business Name”. (See below)
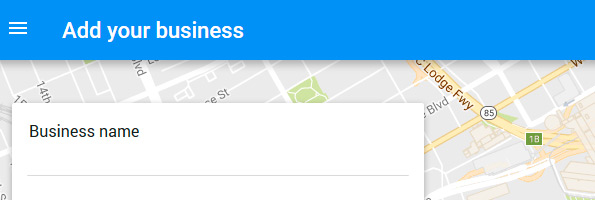
If your business name appears with the proper address, click on it and Google will automatically populate the form with your business information. If your business doesn’t appear, populate the form details with your information. When all the fields of the form have been populated, click the blue “Continue” button.
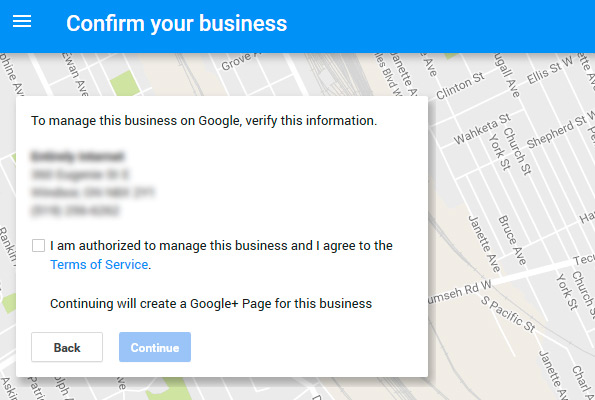
Verify your business listing by confirming the location/address of your business and checking the “I am authorized to manage this business and I agree to the Terms of Service” checkbox. Click the blue “Continue” button. (See below)
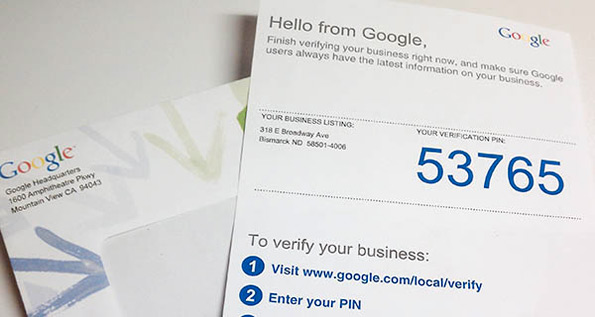
Google will verify your account by sending you a post card within 10-14 days. Once they do visit the link they provide on the postcard, enter in the Access Code they provided and Voilà! You’ve officially setup your account. (See below)
*Note – sometimes someone you know (or don’t know) has already verified your account. You may see a warning at the end of Step 4 that asks you if you want to “Request Ownership” of this listing. Please contact me and I will help walk you through the process of requesting ownership of an already listed Google My Business page.
Topic: Online Marketing
Written By: Sebastian Agosta

My name is Sebastian Agosta and I'm a Web Designer/Digital Marketer/Google Ads Partner living and working in Windsor, Ontario. I've been designing and developing websites professionally for over 17 years and also have experience in SEO, social media marketing & content marketing. My goal is to help small to medium sized businesses in Windsor-Essex County grow their online presence through unique and inventive digital marketing strategies. My blog offers insights and opinions on all things digital marketing and web design.
![]()
